Last Updated on October 28, 2025 by Kymberley


Remove the roast from the refrigerator, take off any wrapping, pat the roast dry to remove any moisture, and place it on a plate. Then let it sit at room temperature (72 degrees Fahrenheit) for 30-40 minutes.
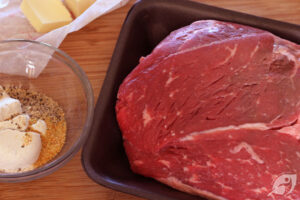
![Prepare the sear seasoning by combining the flour, Rancher Rub [1], and garlic powder in a small bowl and whisk until blended. Then season and coat the roast with the sear seasoning mixture on all sides.](https://gfreedeliciously.com/wp-content/uploads/2022/02/beef-pot-roast-step2-680x453-1.jpg)
About 15 minutes before searing the roast, preheat the oven to 350° F. While the oven is heating, prepare the sear seasoning by combining the flour, Rancher Rub [1], and garlic powder in a small bowl and whisk until blended. Then season and coat the roast with the sear seasoning mixture on all sides.
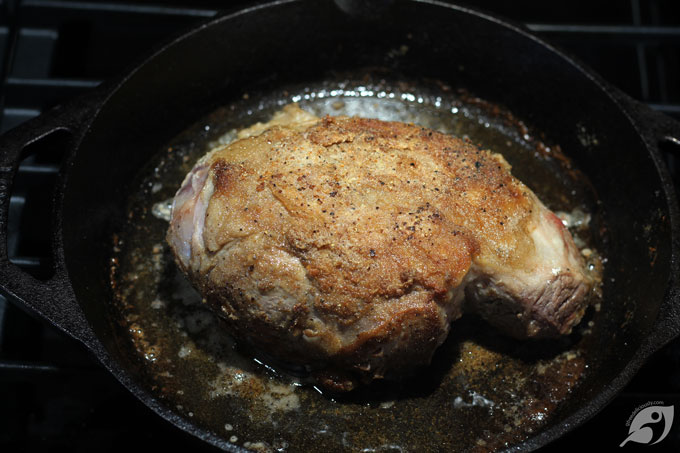
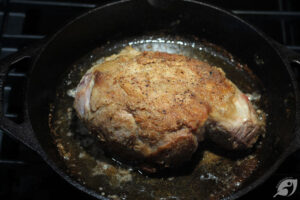
Once coated, heat a heavy dutch oven or cast iron pan on high heat on the stovetop, then add the seasoned spoon roast to the pot, fat side down, and let it sear for 3-4 minutes. Next, flip and sear on the opposite side an additional 3-4 minutes before removing the roast from the pot. Let rest on a plate and continue by cooking the sliced onion.

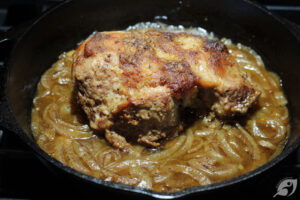
Using the same pot, reduce the heat to medium, then add 2 tablespoons of butter and the sliced onions to the dutch oven. Let the onions hang out for 2-3 minutes until they become translucent and begin to turn brown and caramelize.

When caramelized, push the onion to the sides of the dutch oven before placing the roast fat side up back into the pot. Then, add the beef broth, cover with the lid and place the covered pot into the preheated oven to braise for about 2-1/2 (+/-) hours.

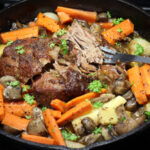
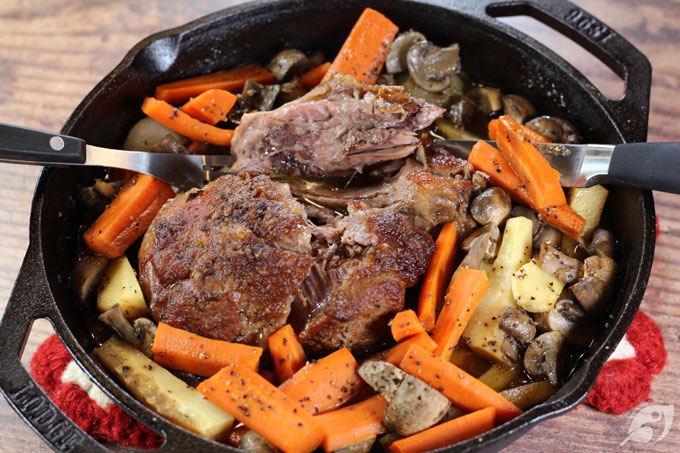
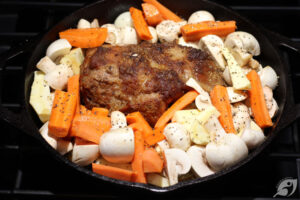
After 2+ hours have passed, add the veggies to the pot with the meat. Season lightly with salt and pepper, and add a bit more beef broth if necessary. Cover and return to the oven at 350°F for about 45 minutes longer until the veggies are tender when pierced.
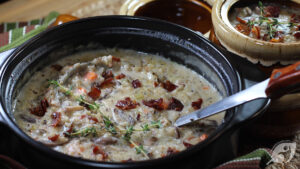
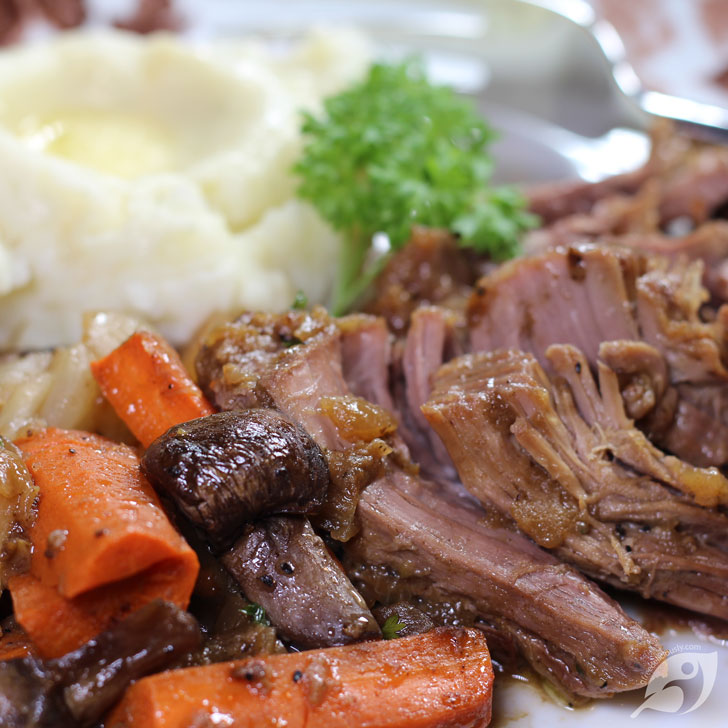
You’ll know the roast is ready for serving when the veggies are fork-tender and the meat tears easily with a fork. Garnish with fresh parsley if desired.
![Cut the potatoes into uniform chunks and place them in a heavy saucepan along with the garlic. Cover with water, bring to a boil, lower heat to medium, and cook until the potatoes are fork-tender for about 20 minutes. [2]](https://gfreedeliciously.com/wp-content/uploads/2022/02/potato-boiling-680x452_273138532.jpg)
Cut the potatoes into uniform chunks and place them in a heavy saucepan along with the garlic. Cover with water, bring to a boil, lower heat to medium, and cook until the potatoes are fork-tender for about 20 minutes. [2]

Drain the potatoes and garlic and mash together. Stir in the hot milk, season to taste with salt and pepper, and add the 2 tablespoons butter (less if desired) or oil. Top with remaining 1 tablespoon butter pat, serve immediately.
Patience is a virtue when making the perfect pot roast. Unfortunately, this is not a quick meal that can be prepped and served in little to no time flat. The secret is in simmering the meat over several hours through the cooking method called braising. To make a Yankee Pot Roast, you’ll add vegetables to the pot later, so they do not over-cook. Try including various herbs and spices to make this recipe into your unique signature version. You could also add tomato paste, wine, or (gluten-free) beer in place of or in addition to the beef broth. The result of these simple ingredients and long hours spent in the oven is a dish of meltingly tender meat and rich, flavorful gravy.
Is it any wonder that this Yankee pot roast has been gracing tables from New England and across the country for so long? Enjoy!
XXO


Beef Pot Roast with Homestyle Garlic Mashed Potatoes
(Click to prevent your screen from going dark.)
Ingredients
Equipment
Nutrition
Method
- Remove the roast from the refrigerator, take off any wrapping, pat the roast dry to remove any moisture, and place it on a plate. Then let it sit at room temperature (72 degrees Fahrenheit) for 30-40 minutes. Meanwhile, cut the large onion into two halves and remove the peel. Then cut both halves into about ¼-inch thick slices, discarding the root end. Set aside. Measure the beef broth set aside. Next, prepare the carrots, button mushrooms, parsnips, and pearl onions, setting them aside until needed.2-3 pound Sirloin Spoon Roast

- About 15 minutes before searing the roast, preheat the oven to 350° F. While the oven is heating, prepare the sear seasoning by combining the flour, House Seasoning [1], and garlic powder in a small bowl and whisk until blended. Then season and coat the roast with the sear seasoning mixture on all sides. Once coated, heat a heavy dutch oven or cast iron pan on high heat on the stovetop, then add the seasoned spoon roast to the pot, fat side down, and let it sear for 3-4 minutes. Next, flip and sear on the opposite side for an additional 3-4 minutes before removing the roast from the pot. Let rest on a plate, and continue by cooking the sliced onion.1/8 cup gluten-free All-Purpose Flour, 1-1/2 teaspoons House Seasoning Blend & Rub, 1/2 teaspoon Garlic powder

- Using the same pot, reduce the heat to medium, then add 2 tablespoons of butter and the sliced onions to the Dutch oven. Let the onions hang out for 2-3 minutes until they become translucent, turn brown, and caramelize.2 tablespoons Butter, 1 large Onion, 1-1/2 cups Beef Broth

- When caramelized, push the onion to the sides of the dutch oven before placing the roast fat side up back into the pot. Then, add the beef broth, cover with the lid and place the covered pot into the preheated oven to braise for about 2-1/2 (+/-) hours.
- After 2+ hours have passed, it’s time to add the veggies to the pot along with the meat. Traditional vegetables are carrots, mushrooms, parsnips, and pearl onions. You could also add the potatoes and garlic cloves to simmer with the beef and veggies until they are fork-tender [2]. Although, my preference is to cook the potatoes and the garlic on their own in a heavy saucepan, so the potatoes develop a deep garlicky taste as they boil. After adding your vegetables, season lightly with salt and pepper, and add a bit more beef broth if necessary. Cover and return to the oven at 350°F for about 45 minutes longer until the veggies are tender when pierced.Carrots, Button Mushrooms, Parsnips, Pearl Onions, Yukon Gold or Red Potatoes
- You’ll know the roast is ready for serving when the veggies are fork-tender and the meat tears easily with a fork. Garnish with fresh parsley if desired. Serve this dish family-style straight from your dutch oven, plated individually, or present the tender roast on a serving platter surrounded by the vegetables alongside gravy in a bowl or gravy boat and a side dish of mashed potatoes.Parsley


- These are classic mashed potatoes brightened up with a sizeable amount of garlic. Feel free to adjust the garlic to taste. To deepen the flavor, try roasting the garlic cloves beforehand, then mix the roasted cloves with the potatoes during the mashing.
- To make the potatoes on the stovetop, cut them into uniform chunks and place them in a heavy saucepan along with the garlic. Cover with water, bring to a boil, lower heat to medium, and cook until the potatoes are fork-tender for about 20 minutes. [2]4-6 medium Potatoes, 4-6 cloves Garlic, 1 teaspoon Salt
![Cut the potatoes into uniform chunks and place them in a heavy saucepan along with the garlic. Cover with water, bring to a boil, lower heat to medium, and cook until the potatoes are fork-tender for about 20 minutes. [2]](https://gfreedeliciously.com/wp-content/uploads/2022/02/potato-boiling-680x452_273138532-300x199.jpg)
- Drain the potatoes and garlic and mash them together. Stir in the hot milk, season to taste with salt and pepper, and add the 2 tablespoons butter (less if desired) or oil. Top with remaining 1 tablespoon butter pat, and serve immediately.3 tablespoons Butter, 3/4 cup hot Milk, Salt and freshly ground black pepper

![Cut the potatoes into uniform chunks and place them in a heavy saucepan along with the garlic. Cover with water, bring to a boil, lower heat to medium, and cook until the potatoes are fork-tender for about 20 minutes. [2]](https://gfreedeliciously.com/wp-content/uploads/2022/02/potato-boiling-680x452_273138532-480x270.jpg)

Kitchen Notes
Personal Notes
Tried this recipe?
Please consider Leaving a Review!This recipe may contain affiliate links. For more information, visit our Affiliate Disclosure.


")