Last Updated on October 28, 2025 by Kymberley


Rhubarb Dream Bars
(Click to prevent your screen from going dark.)
Ingredients
Equipment
Nutrition
Method
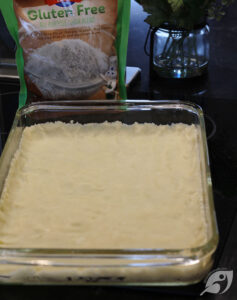
- Combine the flour and powdered sugar; cut the butter until pea-size crumbs form. Press the mixture onto the bottom of a 13x9-inch baking pan—Bake at 350°F (177°C) for 15 minutes.2 cups gluten-free all-purpose Flour, 3/4 cup powdered sugar, 1 cup Butter

- Meanwhile, dice rhubarb stems into 1/2-inch pieces and set them aside.4 cups Rhubarb

- Then blend eggs, sugar, flour, and salt until smooth, creamy, and lemon-colored. Fold in the diced rhubarb. Spread the mixture over the hot crust.4 large Eggs, 2 cups Sugar, 1/2 cup gluten-free all-purpose Flour, 1/2 teaspoon Salt

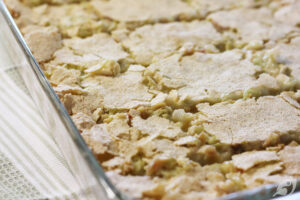
- Bake for 40-45 minutes at 350°F (177°C) until the filling is lightly browned around the edges. Cool; cut into squares or bars for serving.


Kitchen Notes

Try These Extra Tips to Ensure Serving Success!
• Completely cool the rhubarb dream bars before cutting into them. • For these and most other dessert bars, you will get the cleanest cuts if you slightly chill the bars first. Pop the pan in the freezer for 15 minutes before cutting them into individual bars. • Serve them up fancy when entertaining—Add a scoop of vanilla ice cream or a dollop of Cashew Cream Yogurt (recipe coming soon) and a strawberry on top of one of these rhubarb dream bars. Strawberry ice cream is tasty, too, raising the strawberry-rhubarb flavor profile that everyone praises.Measuring Rhubarb
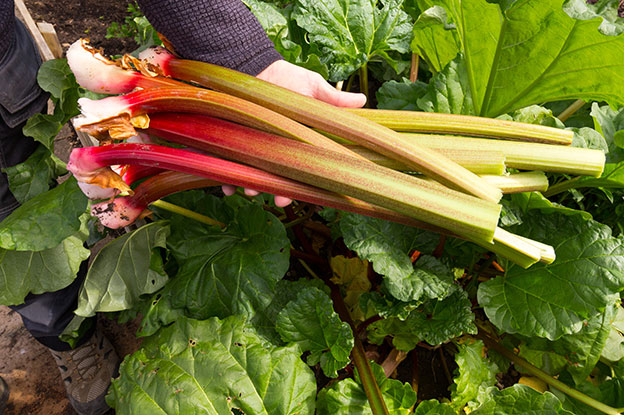
How to Determine How Much Rhubarb You’ll NeedUnited States Customary Unit (USCS), a.k.a. Imperial -
1 bunch = 5-8 stems 5-8 stems = 1-pound (lb.) 1 lb. = 3 cups diced rhubarb 3 cups diced rhubarb = 2 cups cooked rhubarbMetric -
1 bunch = 5-8 stems 5-8 stems = 2.2 kg 2.2 kg = 750 ml diced rhubarb 750 ml diced rhubarb = 500 ml cooked rhubarbStoring Rhubarb
- Freshly picked, unwashed rhubarb can be stored in the refrigerator for 5-7 days. To prepare for refrigeration, trim both ends and place them in a plastic storage bag in the crisper drawer. Wash before using.
- If you notice the rhubarb stems beginning to dry out, wrap them in a clean, damp countercloth or paper towel inside the bag. On the other hand, if you find the stems too moist, wrap them in a dry countercloth or paper towel placed inside a dry bag.
For Long-term Storage:
Freezing Rhubarb
While frozen rhubarb works in most recipes, it will have the best flavor, color, and texture if used within 10-12 months.To freeze:
1. Remove the leaves and ends from the stalks by cutting them. 2. Wash and dry each stalk to remove water and prevent ice crystals and frost from forming. 3. Cut stalks into half-inch pieces. 4. Place a single layer on a shallow tray or baking sheet to freeze until solid, about 1-2 hours. 5. Transfer the frozen pieces to a vacuum-sealed or zipper freezer bag, removing as much air as possible. 6. Date, label, and freeze for up to one year.Dehydrating Rhubarb
1. Pick and remove the leaves and tail end from the rhubarb stalks, wash in cool water, then dry. [1] 2. Dice or cut the stalks into 1/4 to 1/2-inch pieces. 3. Spread in a single layer on mesh-lined dehydrator trays. 4. Dry at 135°F (57°C) for 8-12 hours, depending on humidity. When broken open, rhubarb should feel dry and leathery with no moisture inside. If in doubt, dry until the pieces are crisp. 5. Turn the dehydrator off and let the rhubarb cool overnight. Store it in a glass jar with a tightly sealed lid in a dark, dry cupboard for up to one year.To Rehydrate Dried Rhubarb
1. 1/2 cup dried rhubarb will make roughly 1 cup rehydrated rhubarb. 2. Using the above calculation, measure enough dried rhubarb for your recipe into a bowl and add twice as much boiling water. Let soak until the water is completely cool, about 1-2 hours. Cover rhubarb in a saucepan and simmer for 35-45 minutes or until plumped up and tender for quicker results. 3. Drain the water and use it as you would for fresh or frozen rhubarb in your recipes.Personal Notes
Tried this recipe?
Please consider Leaving a Review!This recipe may contain affiliate links. For more information, visit our Affiliate Disclosure.

Our family fell in love with these Rhubarb Dream Bars the first time I made the recipe shortly after receiving the C.P.E.S. cookbook. And ever since, it has been the very first rhubarb recipe made in spring using this versatile vegetable as soon as the slender stalks pop from the ground. The bars are a favorite dessert for many reasons, though primarily because of their perfect balance of sweetness and tartness that bursts with a unique, almost lemony seasonal freshness. And who could not love the shortbread crust?
If you’re new around here, we invite you to try these old-fashioned Rhubarb Dream Bars and check out a few of our other always gluten-free recipes.